In order The following database content transport procedure needs to be performed to move IFTT together with existing customizing, configuration, and test cases, the following database content transport procedure needs to be performed. It is mandatory to follow the consecutive instructions. It is important to understand that this transfer function is to support a migration of IFTT from one system to another system. .
The transfer is migration that transfers all objects and overwrites any configuration that is already in place on the target system.
To transfer move new testcases test cases between IFTT instances, you need to use the export and import function. This transport mechanism for testcases test cases will not overwrite anything in the target systems but is only for testcases test cases and not for configuration/automation object definitions.
The The Transfer of IFTT configuration and testcases test cases is to support the initial setup of new IFTT instances. The procedure documented below is based on standard functionality provided by SAP to transport table contents and should be only executed by . Only an experienced SAP administrator should execute it, with the relevant SAP basis and ABAP background. The procedure below is not an int4 Int4 IFTT standard function but an SAP function.
The detailed list of tables is attached here . Please perform the below procedure for chosen tables.
Go to transaction SE10, and it is needed to creat create a new transport request there. Click the Create button
Click the Create button on the top left of the screen or press F6.
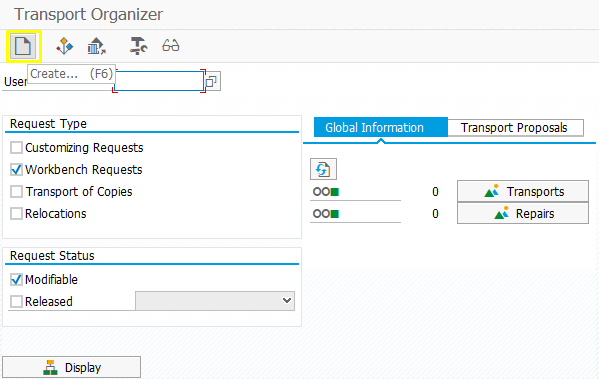
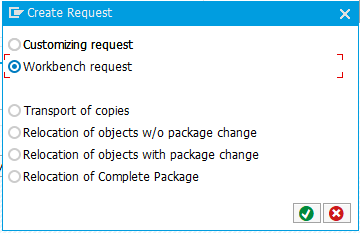
In the popup select pop-up, select the radio button Workbench request, continue.
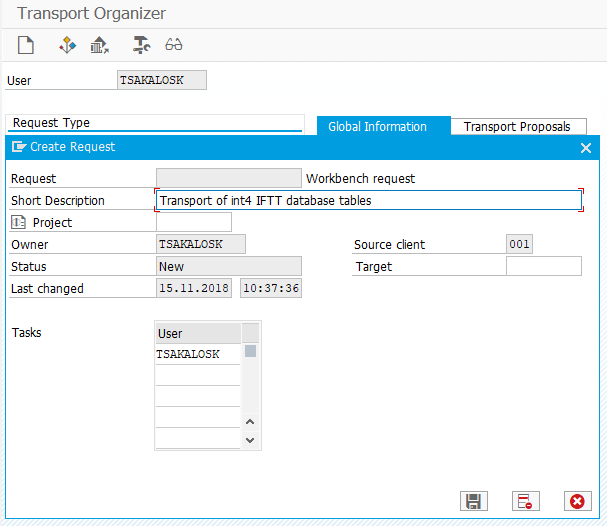
On the next popup fill a Description of the transport next pop-up, fill in a Description of the transport request. And click save.
The next step is to change the type of transport , as now the transport has status unclassified.
Select the transport and go to menu Request/Task -> Change Type...
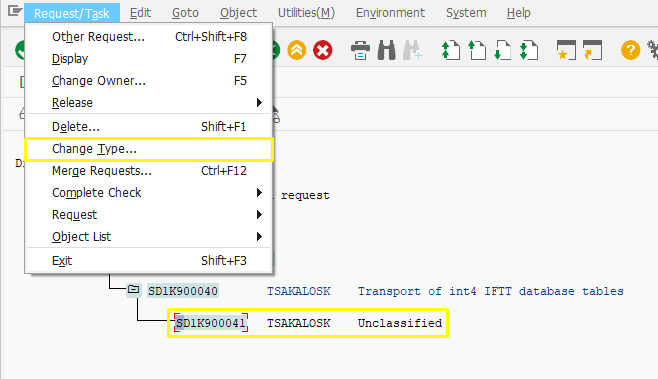
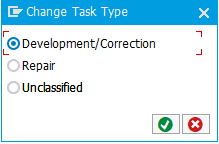
On the popup choose pop-up, choose the radio button Development/CorrectionCorrection. After clicking the checkboxcheckbox, the status of the transport will be changed.
NextThe next step is getting to the change request/task by double-clicking on the transport.
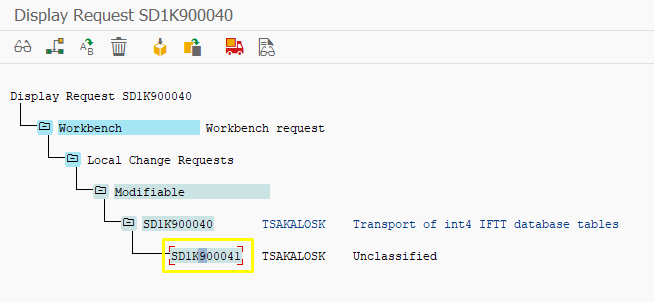
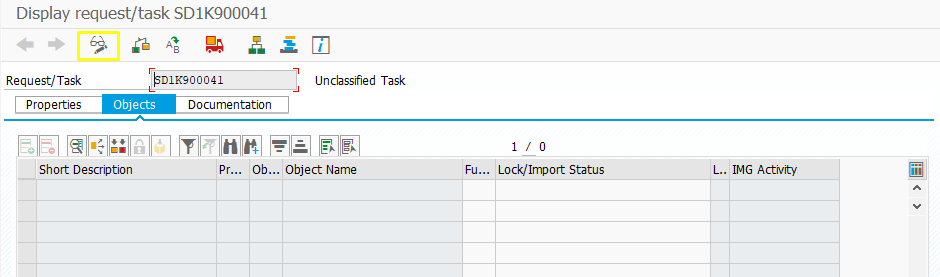
At the Display request/task screen , go to change mode , by clicking the icon Display <-> Change or with Ctrl+F1.
One last step is to specify the tables which are going to tables that will be in the transport with their content.
You can copy the list of tables and paste it to the Change request/task table. Make sure that all the required tables are copied to the list. Press Press Enter.
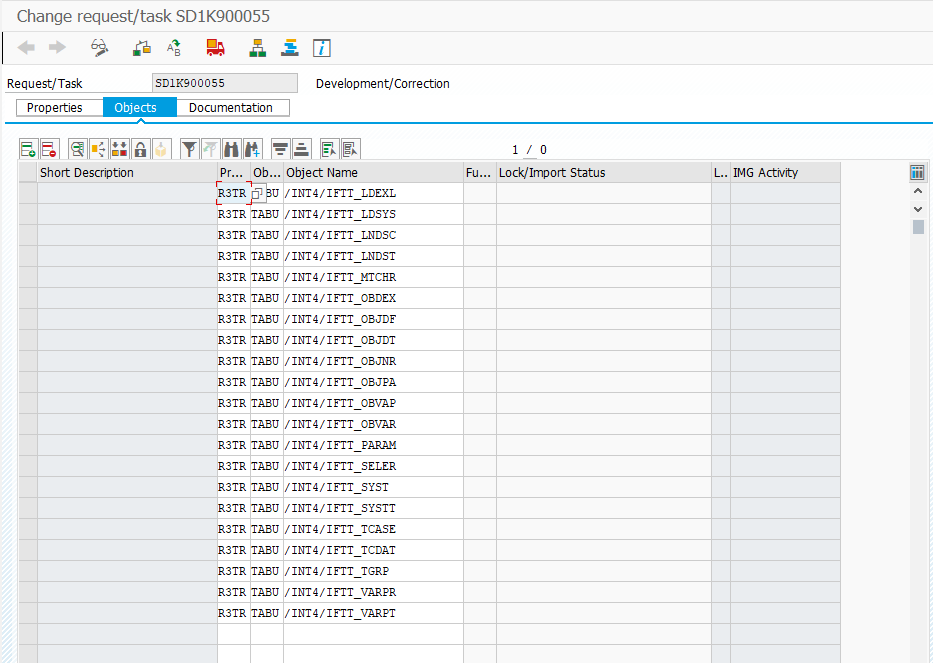
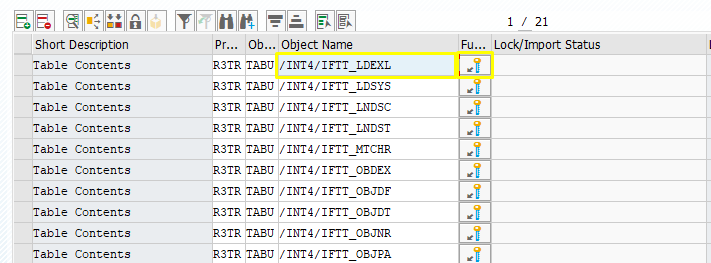
For each table, it is needed to choose the values that have to be transported.
The following steps must be performed precisely, otherwise, the transport will fail.
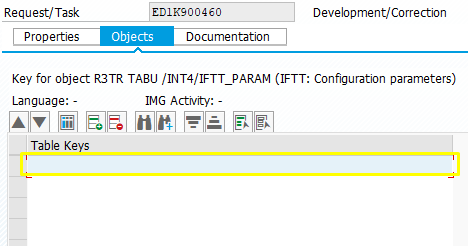
Double click on the Object Name or mark the wanted line and click the function “Object with keys”.
You must perform the following steps precisely. Otherwise, the transport will fail.
Double click on the Object Name or mark the wanted line and click the function “Object with keys.”
For some tables, you will have to choose table keys from more than one table, proceed like in the screens below.
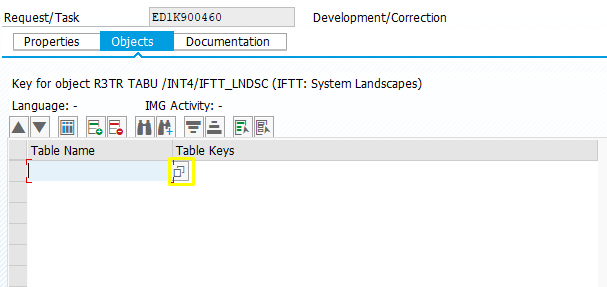
FirstlyFirst, choose one table.
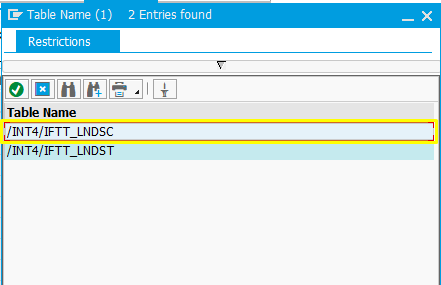
Double click in the Table Keys space and proceed as it is described further (in the case where you have only one table).
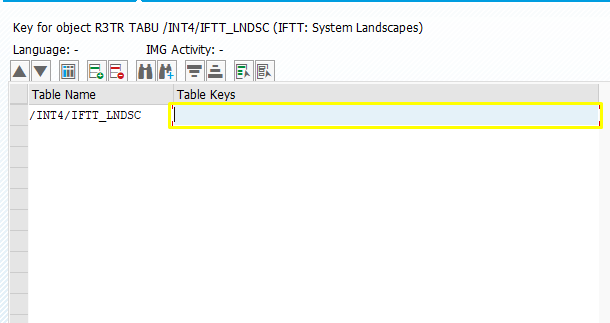
If you have only one table to choose from , by doubledouble-clicking on the space of Table Keys you are going to choose the transferred values. , you will select the transferred values.
In In our case , it is needed to transport all the data , so for each table field, we put one asterisk *, no matter how many are the key fields , and as MANDT the client number.
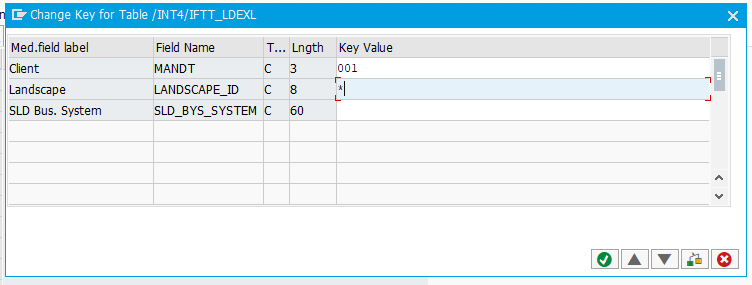
So for each table, the Table Keys value is like below.
...